- By
- Posted Monday, July 19, 2021 - 14:45
Drones already have their own internal IMU's, but those IMU's lack the accuracy needed for larger flight tasks. For shorter flights and recreational flying, the internal IMU is precise enough to keep the drone running as expected. A
ABSTRACT
Over the course of the Spring semester of 2021, we attempted to integrate support for MicroStrain IMUs into the Ardupilot autonomous flight software suite. We did this for school credit here at CSU, as an independent study in partnership with the CSU Drone Center. A good portion of the semester was spent on research and study, as most of the technologies and existing libraries that we worked with were new to us. After lots of learning, we began development and testing of custom Ardupilot builds on a Pixhawk 4 with a MicroStrain 3DM-CX5-45 IMU (3DM-CX5-GNSS/INS). By the end of the semester, we completed one test flight, in which we successfully launched and flew a fixed-wing aircraft in autonomous mode using our custom Ardupilot build, which used accelerometer, gyroscope, barometer, and magnetometer data from only the MicroStrain IMU, with the Pixhawk’s built in IMU completely disabled. There is still much work to be done to get our modifications to Ardupilot production ready, and we hope to continue work on this project in the future.
1. INTRODUCTION
The goal of our project was to create firmware that would successfully integrate a high precision inertial measurement unit (IMU) into an existing drone setup. Drones already have their own internal IMU's, but those IMU's lack the accuracy needed for larger flight tasks. For shorter flights and recreational flying, the internal IMU is precise enough to keep the drone running as expected. As time goes on, small errors in the IMU readings add up and the total error may end up being very large by the end of a long flight. By using a high precision IMU, we can extend the flight time of the drone by increasing the accuracy of readings, thereby reducing the small errors. We selected the MicroStrain IMU, a high precision IMU designed for spacecraft. Since it is made for devices that require almost exact measurements, the IMU's precision will keep our drone on the correct path for longer periods of time.
1.1 Applications
Having a drone that can fly for long periods of time is useful for a variety of missions. Appraisers and foresters alike could use these drones for mass surveying of wildlife and structural damage due to fire. Currently, nationwide postal and package delivery companies are looking at drone delivery, which would require a drone that is accurate and flies long enough to deliver many packages. As people explore more uses of different drones and robots, a high precision option can even help archeologists and marine biologists with their work by going to places that humans cannot. Improving the accuracy of existing drone software opens many more possibilities for drones to be used to help people and make new discoveries, and that is why we undertook this project.
APPROACH
2.1 Hardware
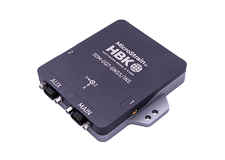
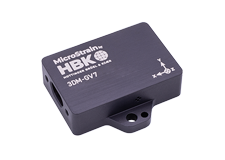
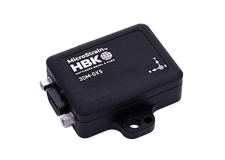
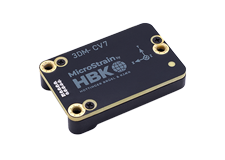
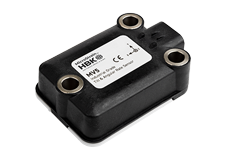
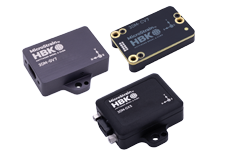
For this project, our team had access to three MicroStrain IMUs and two Pixhawk flight controllers. The three IMUs were a 3DMCX5-45 (3DM-CX5-GNSS/INS), a 3DM-CX5-25 (3DM-CX5-AHRS), and a 3DM-GX5-45 (3DM-GX5-GNSS/INS). The two Pixhawks were a Pixhawk 4 and Pixhawk 1. Our goal was to connect the Pixhawk 4 to the 3DM-CX5-45 (3DM-CX5-GNSS/INS) over a UART cable, using the UART / I2C B port on the Pixhawk, which is traditionally used for connecting an external GPS unit. We were able to test packet configuration on all three IMUs, and run our custom Ardupilot builds using SITL, however we were limited to the one Pixhawk 4 and the one 3DM-CX5-45 (3DM-CX5-GNSS/INS) as our only means of testing builds on full hardware. Throughout the semester we made several attempts to set up additional hardware configurations using the Arduino Uno R3 and Raspberry Pi Pico, but these lead mostly to more complications. Developing with SITL, and testing on the Pixhawk 4 proved to be the most efficient strategy.
2.2 Research Phase
2.2.1 MicroStrain
2.2.1.1
The first approach we entertained was using the MicroStrain Communication Library (MSCL). Since the MSCL was created to make interacting with the MicroStrain IMU simple, the MSCL seemed like a promising solution for getting the MicroStrain to communicate in the way we wanted. As we researched the MSCL, we found that the MSCL required many other libraries as dependencies, and getting these dependencies would increase the resulting build by over the total capacity of the Pixhawk 4 memory. Since memory was an issue, we could not use the MSCL; however, we were able to learn how the checksum was calculated for each packet in the MSCL, and we used that information in creating our own firmware.
2.2.1.2 GUI Tools
The GUI tools for setting up and testing the MicroStrain IMUs were also helpful for our research and development. They allowed us to get a binary (BIN) file early in the semester. Using the BIN file, we could begin working with the packets and parsing out the data we needed even if all of our team members did not have access to a physical IMU. The GUI also allowed us to easily check that we were parsing the correct data. It provided an easy to use platform that allowed us to quickly configure the IMU to stream data at a certain rate without sending packets over the uart port. We used it for debugging as well by checking to make sure we got the same values in Ardupilot that we got from the IMU.
Ardupilot
Frontend and Backend Split
When we first started working with Ardupilot, we found that learning the codebase to an extent that would allow us to expand on it was a significant task. We spent several weeks studying the documentation and trying to learn how the existing sensor libraries provided data to the rest of the software. Initially, we discovered that the InertialSensor libraries provided code for reading data from the internal IMUs on most flight controllers, and thought this would be a good approach to take. We documented and traced code to determine how the internal IMU in the Pixhawk 4 provided data to the other libraries. We found that the sensor libraries were split into a specific backend class for each sensor model which communicated directly with the hardware, and a generic backend class which received data from the backends and provided it to the rest of the software. Our first attempt at integrating the MicroStrain IMU involved writing a new backend class that extended the AP_InertialSensor_Backend class. As we progressed in this direction, we began to realize that this approach was much more suited to the integration of an internal sensor, as opposed to our IMU which was connected via UART.
External AHRS
Upon further exploration of the codebase, we discovered a new addition to Ardupilot, the AP_ExternalAHRS class. This class was written to support the integration of the VectorNav VN-300 IMU, a sensor with a very similar purpose to our MicroStrain IMUs. We realized that leveraging this class would make our job much easier.
2.3 Development Phase
Ping and Packet Parsing
To understand how serial devices work with computers, we started by writing a simple script in python that sent a ping to and received information from the IMU, which was connected via USB to the computer the script was created on. Once we got this script to work, we started translating the script into C++ so that it would work with the Ardupilot library, which is also in C++. Transitioning between the two languages was somewhat tricky. The first C++ script was developed using a library that modeled pyserial, but it had too many dependencies to fit with the Ardupilot library. The C++ script was then reworked into a test sketch that used the serial communication resources in the Ardupilot library, and once that was working, the script was further developed to read and parse packets.
2.3.2 SITL Testing
As mentioned previously, over the course of the project we had access to only one functioning pair of IMU and Pixhawk. This meant that much of the development and testing was done on the Ardupilot SITL (Software in the Loop) simulator. As we learned to use SITL we found it actually provided many benefits. Running the code with SITL allowed for much easier breakpoint debugging and the code built for SITL much more quickly than on hardware. One challenge we ran into with SITL development was connecting the IMU. Eventually we found a way to plug it into a USB port and map the USB port to a device from the Ardupilot serial manager, allowing us to effectively test communication with the IMU through SITL.
2.3.3 GDB Debugging
While debugging was fairly straightforward with SITL, when we ran new code on our Pixhawk and IMU and encountered problems it was more difficult to troubleshoot. Initially lots of debugging was done simply by placing print statements around the code to determine where it was failing. This strategy has obvious disadvantages, namely it is inefficient and can create more confusion. We purchased a Segger J-Link EDU Mini for the purpose of hardware breakpoint debugging. We used the JLink GDB server in conjunction with the built in Ardupilot GDB debugging commands. This setup allowed us to analyze what our code was doing much more precisely when we ran it on hardware.
2.3.4 Packet Collection Inside of Test Sketch
Once communication with the IMU via test sketch was achieved, the next step was to collect and parse the information from the IMU.
2.3.4.1 MIP Protocol
While we knew the packet size and rate that the IMU worked at, reading a packet’s worth of bytes at the specified rate was not an effective method for packet collection. We needed to know when a packet started and ended, handle the possibility of corrupted packets, and handle garbage bytes between packets. The solution we came up with was to set up a separate thread to read bytes into a ring buffer of sufficient size as quickly as the MicroStrain would give them to us. The thread ran a loop that performed three actions: read bytes into the buffer, parse available bytes into a packet, and when a full packet had been constructed, parse the sensor data from this packet and send it on its way. The MIP protocol included two sync byte that told us where the packet began, and a fletcher checksum that allowed us to verify the correctness of the bytes. The ring buffer allowed us to hold on to the bytes as we constructed the packet and start over again after the sync bytes in the event that our checksum didn’t match.
2.3.4.2 Packet Parsing
After researching the MIP protocol used by the MicroStrain IMU and reading the IMU manual to learn the packet structure, we looked at the packets we had collected from the IMU and began parsing them out. We separated the header and checksum into their own variables, and then we sent the packet payload to another function that would parse it. We determined which data we would need to parse by looking at Ardupilot's AP_ExternalAHRS library that had implementation for an external VectorNav sensor. Initially, it was complicated to use this library as it was primarily built for the VectorNav sensor, but we discovered that one of the lead developers at Ardupilot was creating code that would split up the frontend and backend firmware. This split allowed us to develop for the MicroStrain sensor using the existing backend. Using the existing implementation as a guide, we parsed information from the MicroStrain data sets and sent that data to the appropriate handlers. Since we programmed packet parsing in a test sketch first, it was easy to test and debug with or without hardware, but we had to make modifications when we moved our code into the AP_ExternalAHRS library.
2.3.5 Moving Packet Parsing into Ardupilot Build
When we initially moved our code from the test sketch, our goal was to get the code inside the library in any way that would make it work. We copied and pasted a lot of the code from our test sketch and worked with it until it would build and run. This exercise led to some messy implementation and some hard coding to get the build to run correctly. After we got it running, we went back and cleaned up the implementation by making functions that were intentional to what we were doing, organizing the code to improve readability, and researching different flags and fields we would need to use in our preflight drone checks. For packet parsing, we implemented a function with a switch statement that checked for packets in the data sets we wanted and sent them to separate functions for more parsing. Those separate functions determined which kind of data was given and stored the data in the appropriate variables. Those variables were later passed to the appropriate handlers in a different function. By structuring our code this way, we can parse and handle more data by introducing additional new variables into the switch statements and building any necessary functions to parse them, which allows us to continue a further integration of the IMU with relative ease compared to when we started integration.
CONCLUSION
3.1 Accomplishments
After much research, testing, and development, we were able to successfully deploy a custom Ardupilot build onto a fixed-wing platform, and fly it using accelerometer, compass, barometer, and gyroscope data from only the MicroStrain IMU. We had to solve many difficult problems to get to this point, most notably the problems of communicating with the MicroStrain IMU from within Ardupilot, and the problem of getting the sensor data to the correct place within the firmware so that the other Ardupilot libraries could access and utilize it. Additionally, we have created a structure within our ExternalAHRS_MicroStrain class that should enable us to implement GNSS data in the future. Our first test flight suffered from severe oscillations in autonomous mode. However, the aircraft was able to stabilize itself, fly between waypoints, and even take off autonomously using data from the MicroStrain IMU.
Future Work
The main goal of our future work is to get the MicroStrain IMU support merged into the Ardupilot library. This will involve rewriting the code that we have to be cleaner and production ready, implementing some functions that are currently hardcoded in a more elegant way, and creating thorough documentation of our code and how to use it. In addition to these logistics, we need to add full support for MicroStrain data. This task will involve switching the raw data we are currently reading to filtered data as well as adding support for GPS. Additionally, we will need to add code to send out packets during the initialization process to ensure the IMU is correctly configured every time. We will also add MicroStrain parameters in Ardupilot and provide detailed documentation on how to build Ardupilot with the MicroStrain IMU support. While there is much work to be done yet, we have surpassed the largest hurdle, so the completion of our main goal is doable and promising.
ACKNOWLEDGEMENTS
Our thanks to MicroStrain for giving us their IMU to work with and to Ardupilot for their software.
