


FAQs
Videos
Refer to the power profiles available under the documentation tab of the node of interest.
V-Link 200: http://www.microstrain.com/g-link-200_power-profile/insert_into_website.htm
G-Link 200: http://www.microstrain.com/g-link-200_power-profile/insert_into_website.htm
G-Link 200 OEM: Coming soon
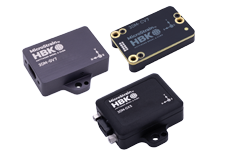
The 200 series wireless nodes have 16 Mbytes of datalogging memory.
Now the question arises, ‘how long can a node datalog before its memory is full?’. The answer is that it varies depending on how many channels are being sampled, sample rate, and data type. Here are two examples:
V-Link-200 set so that channel 1 is enabled with a sample rate 2048 Hz, and data type of Float(4 byte). Our calculation would be:
- 1 channel x 2,048 samples per second = 2,048 data points per second
- 2.048 data points x 4 byte float data packet = 8,192 bytes per second
- 16 MB (rounded down) ÷ 8,192 bytes per second = 1953 seconds (rounded down)
- 1953 seconds ÷ 60 seconds per minute = ~32 minutes to fill the memory
G-Link-200 set so that channels 1, 2 and 3 are enabled with a sample rate of 32 Hz, and data type of int24(3 byte). Our calculation would be:
- 3 channels x 32 samples per second = 96 data points per second
- 96 data points x 3 byte int24 data packet = 288 bytes per second
- 16 MB (rounded down) ÷ 288 bytes per second = 55,555 seconds (rounded down)
- 55,555 seconds ÷ 60 seconds per minute = ~925 minutes (~15 hours) to fill the memory
The V-Link-200 has 4 strain gauge channels that come from the factory set to Full-bridge. When ordering these units, you must specify the bridge completion for each channel. Half and quarter bridge completions are available and channels can be mixed and matched. These completions are accomplished in the factory as part of the final assembly,
See the V-Link 200 user's manual http://www.microstrain.com/sites/default/files/v-link-200_user_manual_85... on how to connect strain gauges (page 44 -45), and pages 57 - 59 on how to calibrate the strain gauge to output µstrain with the V-link-200.
The % bandwidth has to do with how many nodes/channels you can use at one time. When setting up a Synchronized Sampling network, SensorConnect will interrogate each node and assign transmission slots for them to send data to the base station. This is designed to keep the nodes from broadcasting at the same time and causing data loss. The more channels, and higher sample rate of a node will require more transmission slots, thus higher % of available bandwidth used. Use the Calculare System Bandwidth calculator to build your system http://sensorcloud.com/pricing?onlyCalc=true
Excel displays our time stamp incorrectly. If you were to open the data file in Notepad you would see the correct time format.
To correct the data in Excel, Highlight all of column A, right click on the highlighted region and select Format Cells. Under the Number tab select Custom, Scroll to the bottom of the list that appears and select “m/d/yyyy h:mm”. You will need to add “:ss.000” to the end of this, so it looks like this “m/d/yyyy h:mm:ss.000” . Setting the cells to this will give you the highest resolution that Excel can show.
We use Universal Coordinated Time (UTC) to collect data on all of our devices. There is no provision to set the time to a local time zone.
The IEPE-Link™ -LXRS® accepts inputs from most IEPE sensors using the industry standard 10-32 mini-coaxial connector and 2.3 mA constant current excitation.
The input specification for PPS on the 3DM-GX3-25 standard and OEM is LVTTL (low voltage TTL), 5 volt tolerant.
The -25 has a power regulator that will protect up to 15 volts.
Using MIP Monitor software, to reset the device to the factory defaults:
- Establish communication as normal with the sensor.
- Click Settings.
- Click Load Default Settings and a message box pops up.
- Click OK and the message box disappears.
- Click Settings again.
- Click Save Current Settings and a message box pops up.
- Click OK and the message box disappears.
This process does not erase any hard and soft iron calibration that may be on the device.
The Hard and Soft Iron Cal software we provide must be used to do that.